
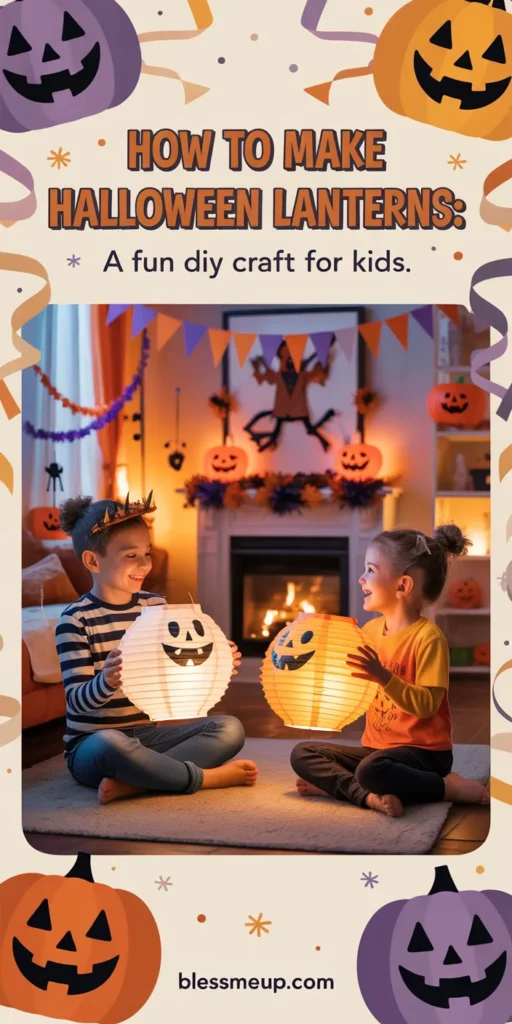
Halloween is the perfect time to bring families together for fun, creativity, and just a little bit of spookiness. While costumes and candy are big parts of the celebration, decorating your home can be just as exciting. One craft that children absolutely love is making DIY Halloween lanterns. These glowing creations are simple, safe, and perfect for kids aged 5–12. Not only do they light up your home with festive charm, but they also help kids develop creativity, patience, and fine motor skills. Best of all, you don’t need expensive tools or advanced crafting experience—just a few affordable supplies and a little imagination!
In this guide, we’ll walk you through everything you need to know: materials, safety tips, easy step-by-step instructions, and fun design variations. Whether your child wants a spooky ghost lantern, a classic jack-o’-lantern design, or a starry night-inspired craft, there’s something here for everyone.
Materials You’ll Need

Here’s a list of basic materials for making Halloween lanterns, along with substitutions to keep things budget-friendly:
-
Empty jars or plastic containers (mason jars, recycled jam jars, or cleaned yogurt tubs)
-
Tissue paper or construction paper (orange, black, white, and green work best)
-
Non-toxic glue or Mod Podge (safe for kids)
-
LED tea lights or battery-operated candles (never use real candles with children)
-
Child-safe scissors
-
Black markers or stickers (for decorating faces and details)
-
Paint and brushes (washable acrylic or tempera paints)
-
Pipe cleaners or ribbon (for handles and decoration)
Estimated cost: $10–15, depending on what you already have at home.
Safety note: Always supervise kids when cutting, gluing, or painting. Avoid glass jars for younger children and opt for plastic containers.
Step-by-Step Instructions for a Basic Halloween Lantern
Follow these easy steps to create your first lantern.
Step 1: Prepare the Container

Wash and dry your jar or container. If using glass with younger children, consider wrapping the edges with painter’s tape to avoid sharp corners.
Step 2: Add the Base Color

Tear pieces of tissue paper in orange, white, or green. Brush a layer of glue on the jar, then stick the tissue paper pieces down, covering the whole surface. Add another thin layer of glue over the top to seal it.
Step 3: Create Spooky Faces

Cut out simple shapes from black paper—triangles for eyes, circles for mouths, or jagged teeth. Stick them onto your lantern to make jack-o’-lantern faces, ghost expressions, or even silly monster grins.
Step 4: Add Handles (Optional)

Twist a pipe cleaner around the rim of the jar or attach ribbon to make a handle. This allows kids to carry their lanterns safely.
Step 5: Add the Glow
Place a battery-operated LED tea light inside. Switch it on and watch your lantern come alive with a spooky, glowing effect!
Estimated time: 45 minutes
Difficulty level: ★★☆☆☆ (easy to moderate)
Safety Considerations
-
No real candles: Always use LED lights to prevent burns or fire hazards.
-
Scissor use: Help younger kids cut out shapes safely or pre-cut them beforehand.
-
Glue safety: Use washable, non-toxic glue to avoid skin irritation.
-
Jar safety: For children under 7, avoid glass jars and stick to lightweight plastic containers.
3 Creative Lantern Design Variations
1. Ghost Lantern

-
Materials: White tissue paper, black paper for eyes and mouth.
-
Steps: Cover the jar with white tissue paper, then glue on two large oval eyes and a round open mouth. Add a ribbon “tail” at the bottom for extra spooky flair.
-
Customization: Add glow-in-the-dark paint to make your ghost shine brighter at night.
-
Skill level: ★☆☆☆☆ (beginner)
2. Classic Pumpkin Lantern

-
Materials: Orange tissue paper, green paper for a stem, black paper for face.
-
Steps: Cover your jar in orange tissue paper. Cut a green paper strip and glue it on top like a stem. Add black triangles for eyes and a jagged smile.
-
Customization: Try silly, scary, or surprised expressions to make a family of pumpkin lanterns.
-
Skill level: ★★☆☆☆ (easy)
3. Starry Night Lantern

-
Materials: Black construction paper, hole punch or star-shaped punch, and tissue paper.
-
Steps: Wrap black paper around your jar and punch out star and moon shapes. Line the inside with white or yellow tissue paper.
-
Customization: Add glitter glue for a sparkling night sky.
-
Skill level: ★★★☆☆ (intermediate, better for older kids)
Variations by Age & Skill Level
-
Younger kids (5–7 years): Stick to tissue paper wrapping and simple shapes. Parents can pre-cut faces to make it easier.
-
Older kids (8–12 years): Encourage more detailed designs like bats, spider webs, or intricate haunted house cutouts.
-
Group activity: Assign each child a different lantern theme and display them together for a Halloween centerpiece.
Troubleshooting Tips
-
Wrinkled tissue paper? Use smaller pieces and smooth with fingers dipped lightly in glue.
-
Shapes won’t stick? Apply glue both under and over the paper cutouts for extra hold.
-
Lantern feels flimsy? Add a second layer of tissue paper for durability.
Clean-Up Tips
-
Cover your workspace with old newspaper or a plastic tablecloth before starting.
-
Use washable paint and glue for quick wipe-downs.
-
Keep a damp cloth nearby for sticky fingers.
-
Encourage kids to help with cleanup—it teaches responsibility and makes them proud of their work.
Educational Benefits of This Craft
-
Fine motor skills: Cutting, gluing, and decorating strengthens hand muscles.
-
Creativity: Choosing colors, faces, and designs fosters self-expression.
-
Problem-solving: Kids learn to fix wrinkles, re-glue pieces, or adapt when things don’t work as planned.
-
Patience & focus: Completing a step-by-step project encourages concentration.
-
Teamwork: Working alongside siblings or friends builds cooperation and communication.
Final Thoughts
Making Halloween lanterns is more than just a craft—it’s an opportunity to build memories, spark creativity, and fill your home with festive glow. With just a few simple materials, kids can design unique lanterns that reflect their imagination while parents enjoy safe, family-centered fun.
Whether you choose the spooky ghost, cheerful pumpkin, or magical starry night variation, the end result will be something your child is proud of. So gather your supplies, clear a space on the table, and let the crafting begin. This Halloween, light up your home with lanterns made with love, laughter, and creativity.


Pingback: How to Make a Paper Spider Craft: Easy & Fun Halloween Activity for Kids - blessmeup.com