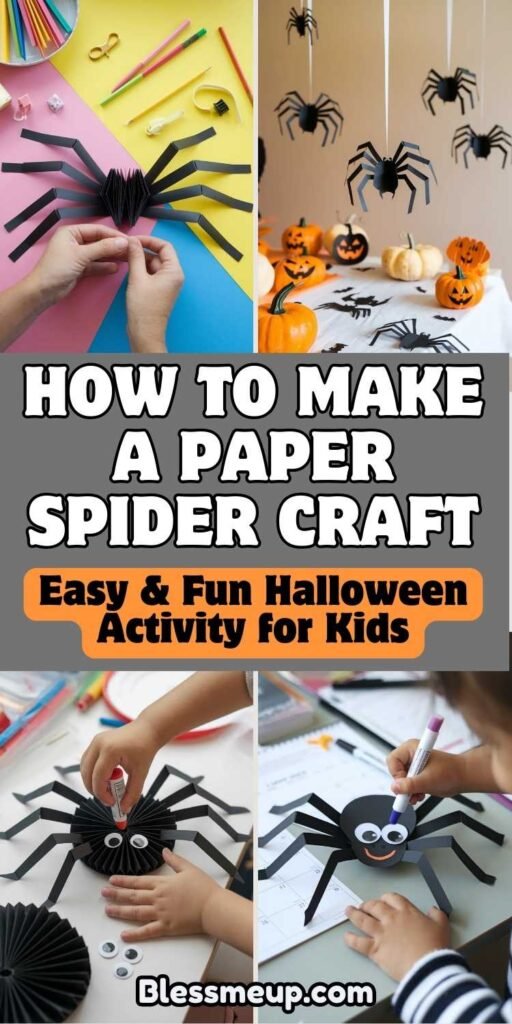
Halloween is the perfect time to get creative with your kids, and what better way to celebrate the spooky season than by making a fun Paper Spider Craft? This easy project is designed for children aged 6–12 years, requires minimal materials, and can be completed in 30–45 minutes. Best of all, it develops fine motor skills, creativity, and spatial awareness while keeping kids entertained.
In this guide, you’ll find a detailed materials list, step-by-step instructions, safety tips, educational insights, and fun variations so your child can craft their very own creepy-cute spider to decorate your home or classroom this Halloween.
Materials You’ll Need

Before diving in, gather the following materials. Most of these can be found at home or at any local craft store:
-
Black construction paper (1–2 sheets)
-
Googly eyes (2 medium or small, or draw your own!)
-
Child-safe scissors
-
Non-toxic glue stick or craft glue
-
White chalk, crayon, or gel pen (optional for web details)
-
Pipe cleaners (4 black, or any fun color for spider legs)
-
Stapler or tape (optional, for extra leg support)
-
Ruler and pencil
-
Optional decorations: glitter, stickers, sequins, or small Halloween cutouts
Safety First
Crafting with kids is fun, but safety always comes first. Here are a few tips:
-
Always use child-safe scissors with rounded edges.
-
Younger children (ages 6–8) may need light supervision while cutting circles and strips.
-
Encourage children to use glue instead of sharp tools like hot glue guns.
-
Remind kids to keep their work area clean—no running around with scissors!
-
If using small googly eyes or beads, supervise closely to prevent choking hazards.
Step-by-Step Instructions
Ready to make your very own paper spider? Let’s get started!
Step 1: Make the Spider’s Body

-
Take your black construction paper and draw two circles with a pencil—one large (about 4–5 inches across) for the body and one smaller (about 2–3 inches) for the head.
-
Carefully cut out both circles. These will be the spider’s body parts.
-
For younger kids, you can pre-draw the circles or even trace around household items like a cup or lid to make cutting easier.
Visual cue: Imagine two big Oreo cookies—one for the body and one for the head.
Step 2: Attach the Head to the Body
-
Place the smaller circle (head) slightly overlapping the larger circle (body).
-
Glue them together, pressing firmly so they stick well.
-
Let your child name their spider—it makes the craft more personal and fun!
Encouragement tip: “Wow, your spider’s body looks amazing already! Let’s give it some legs to crawl around.”
Step 3: Create the Spider Legs

-
Take 4 pipe cleaners and cut each in half, making 8 legs.
-
Bend each piece in the middle, then bend again at the “knee” so they look like real spider legs.
-
Glue or tape the legs to the back of the body—four on each side.
-
Press gently until they stick. If the glue isn’t strong enough, use tape or a small staple for reinforcement.
Fun fact: Did you know real spiders have 8 legs, while insects only have 6? This is one way scientists tell them apart!
Step 4: Add the Eyes

-
Place two googly eyes on the spider’s head and glue them down.
-
If you don’t have googly eyes, draw them on with white chalk, crayon, or a gel pen.
-
For a silly twist, give your spider 4, 6, or even 8 eyes—just like real spiders!
Child-friendly humor: “Some spiders can have up to 8 eyes… imagine how good they must be at playing hide-and-seek!”
Step 5: Decorate Your Spider

-
Use white chalk, crayons, or markers to draw a spooky web on another sheet of paper.
-
Place your spider on top of the web for a Halloween decoration.
-
Add glitter or sequins for a magical touch.
-
If making multiple spiders, hang them with string from the ceiling for a creepy-crawly Halloween vibe!
Educational Connection

This craft is more than just fun—it’s a chance to learn! While making the spider, you can talk about:
-
Spider biology: Spiders aren’t insects—they belong to a group called arachnids.
-
Spider’s role in nature: They help control insect populations by catching flies and mosquitoes in their webs.
-
Halloween symbolism: Spiders are linked to Halloween because of their spooky webs and mysterious movements.
Fun Variations

Want to make your spider even more unique? Try these variations:
-
Rainbow Spider: Use colorful paper and pipe cleaners for a bright, silly version.
-
Giant Spider: Use larger sheets of paper and jumbo googly eyes for a classroom decoration.
-
Mini Spiders: Cut smaller circles to make a whole family of spiders!
-
Glow-in-the-Dark Spider: Add glow paint or glow-in-the-dark stickers to make it shine at night.
-
Hanging Spider: Tape string to the top of the body and let it dangle from a doorframe or shelf.
Troubleshooting Tips
-
Legs keep falling off? Use tape or a stapler instead of glue.
-
Paper keeps tearing? Try thicker construction paper or cardstock.
-
Spider looks lopsided? Remind kids that no spider is perfect—and that’s part of the fun!
Why Kids Love This Craft
-
It’s hands-on and gives them a sense of accomplishment.
-
They can personalize it with colors, eyes, and decorations.
-
It ties into Halloween fun while sneaking in a bit of learning.
-
It’s a great way to decorate classrooms, playrooms, or living rooms for the spooky season.
Final Thoughts
Making a Paper Spider Craft is the perfect way to combine creativity, fun, and learning this Halloween. It’s safe, affordable, and easy enough for kids aged 6–12 to enjoy with minimal supervision. Plus, with endless variations, no two spiders will look the same—just like in nature!
So gather your supplies, roll up your sleeves, and let your child’s imagination run wild. By the end of this craft, you’ll have not just a spooky Halloween decoration, but also a memory of laughter, learning, and creativity shared together.
Happy crafting, and watch out—you might just find a whole family of paper spiders crawling across your walls this Halloween!


Pingback: How to Make Cotton Ball Ghosts: A Cute & Easy DIY Halloween Craft for Kids - blessmeup.com