
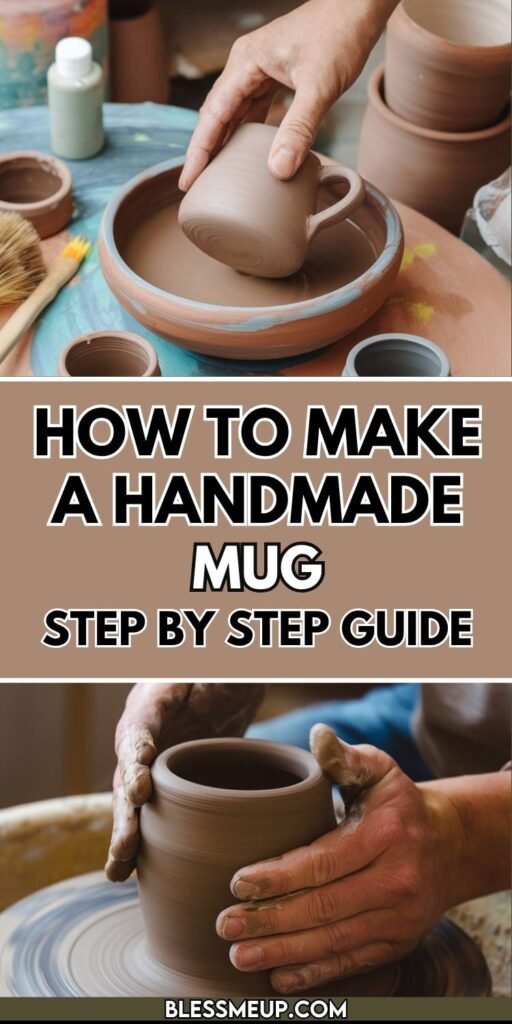
There’s something magical about drinking coffee, tea, or hot chocolate from a mug you crafted with your own hands. Handmade ceramics are more than kitchenware—they’re a reflection of your creativity, patience, and personal touch. The process of shaping clay, smoothing imperfections, glazing in your favorite colors, and seeing the final piece emerge from the kiln can be both therapeutic and empowering.
Even if you’ve never worked with clay before, making your own mug is an accessible project. With the right guidance, tools, and a little patience, you can create a beautiful, functional piece that you’ll treasure every day. This guide walks you through everything from choosing clay to finishing touches, ensuring you feel confident at each step of the journey.
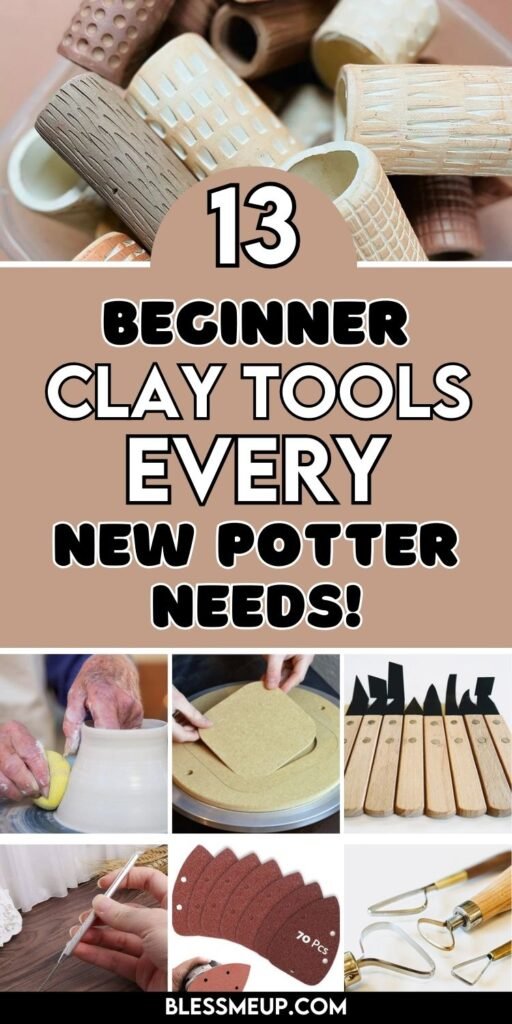
Materials and Tools Needed
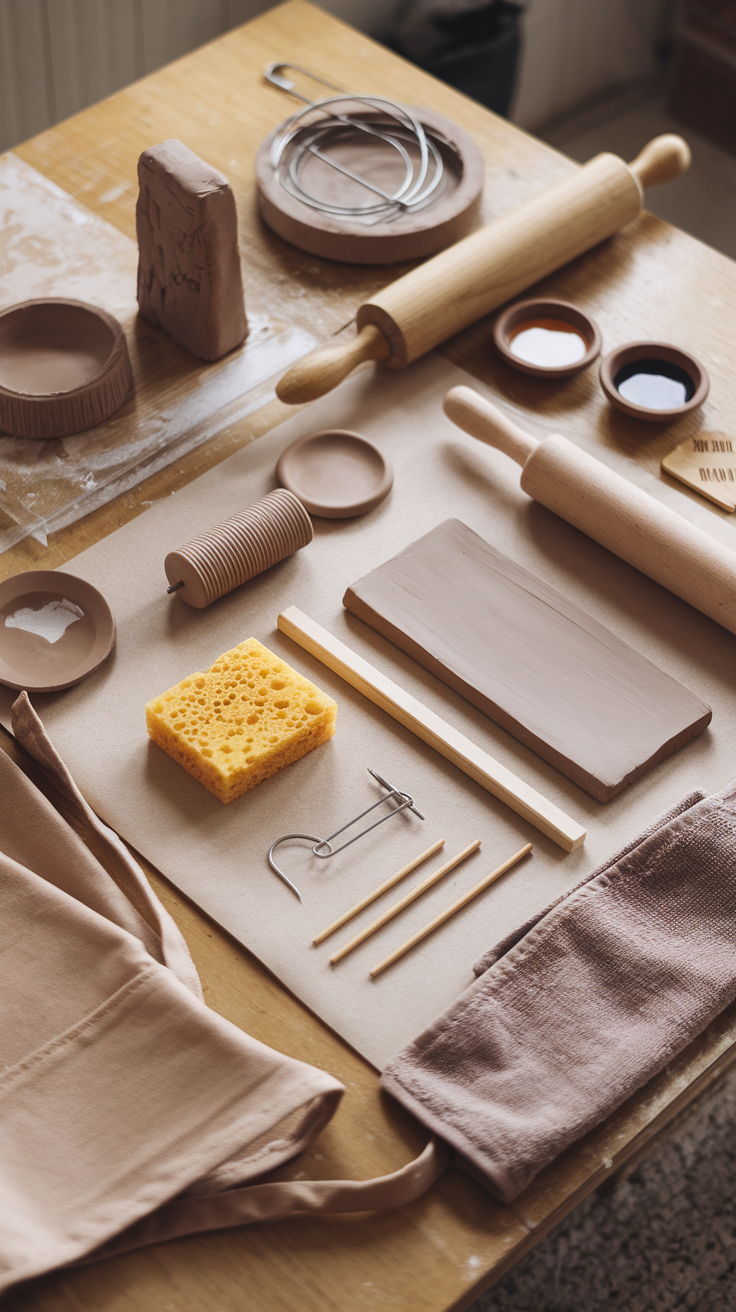
Before diving into the process, gather the right materials. Beginners don’t need fancy equipment—just a few essentials:
-
Clay (stoneware or earthenware for beginners)
-
Clay tools (needle tool, wire cutter, wooden rib, sponge)
-
Rolling pin or slab roller (for hand-building)
-
Pottery wheel (optional, if trying wheel-throwing)
-
Slip (clay mixed with water) for attaching handles
-
Glazes (food-safe, beginner-friendly options)
-
Kiln access (check local studios or community centers)
-
Safety gear (apron, towel, gloves, dust mask)
Tip: If you’re just starting out, many craft stores sell beginner clay kits with the basics included.
Choosing the Right Clay
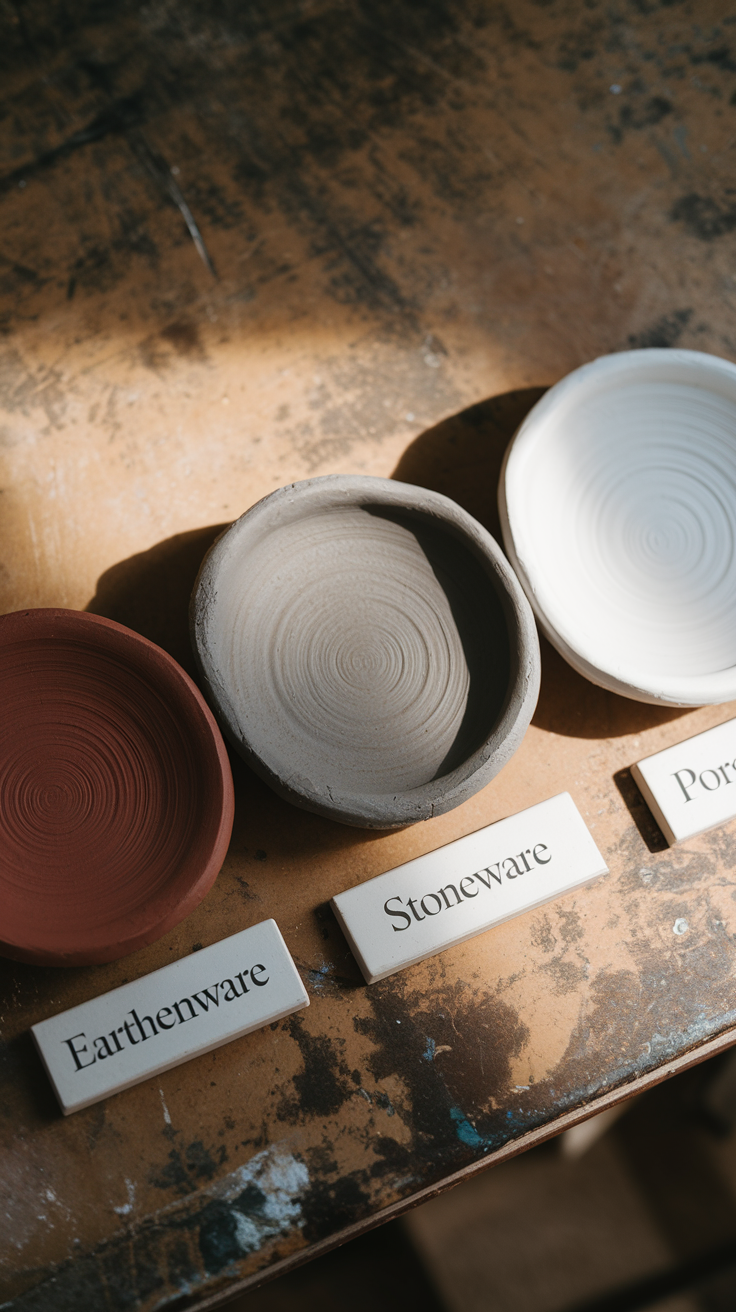
Not all clay is the same, and choosing the right type can make your first project smoother. Here are the best options for mugs:
-
Earthenware Clay: Soft and easy to work with, fires at lower temperatures. Great for beginners, though less durable than other types.
-
Stoneware Clay: Stronger and more durable, making it perfect for functional mugs. Requires higher firing but gives a beautiful, sturdy finish.
-
Porcelain: Fine and elegant, but tricky for beginners due to its delicate nature. Best attempted once you’re more experienced.
Begin with stoneware—it’s forgiving, durable, and perfect for mugs that you’ll actually use daily.
Preparation Techniques
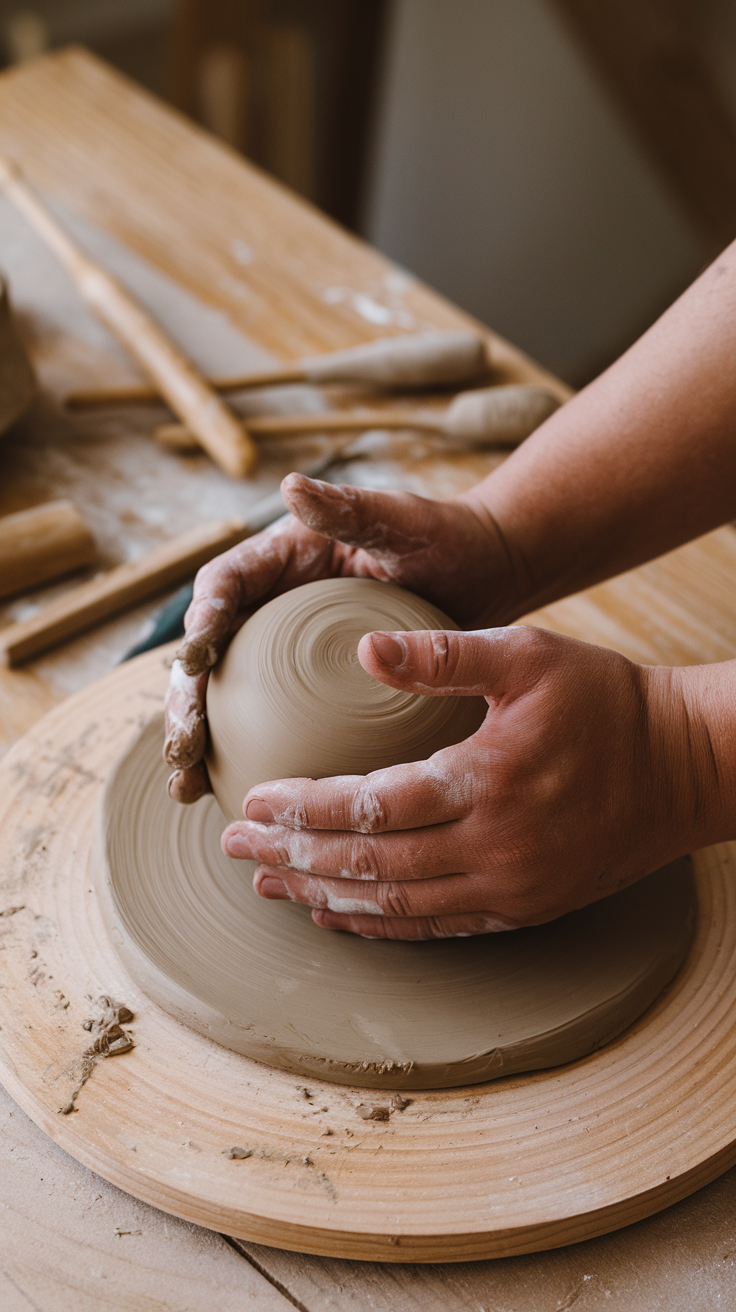
Before shaping your mug, proper clay preparation is key:
-
Wedge the clay: Knead it like bread dough to remove air bubbles. This prevents cracks during firing.
-
Moisture balance: If the clay feels too dry, spritz with water; too wet, let it sit uncovered for a few minutes.
-
Portioning: Cut the clay into the amount needed—usually a ball about the size of your fist for one mug.
Tip: Beginners often skip wedging, but it’s essential for strong, crack-free mugs.
Shaping Methods: Hand-Building or Wheel-Throwing
Hand-Building
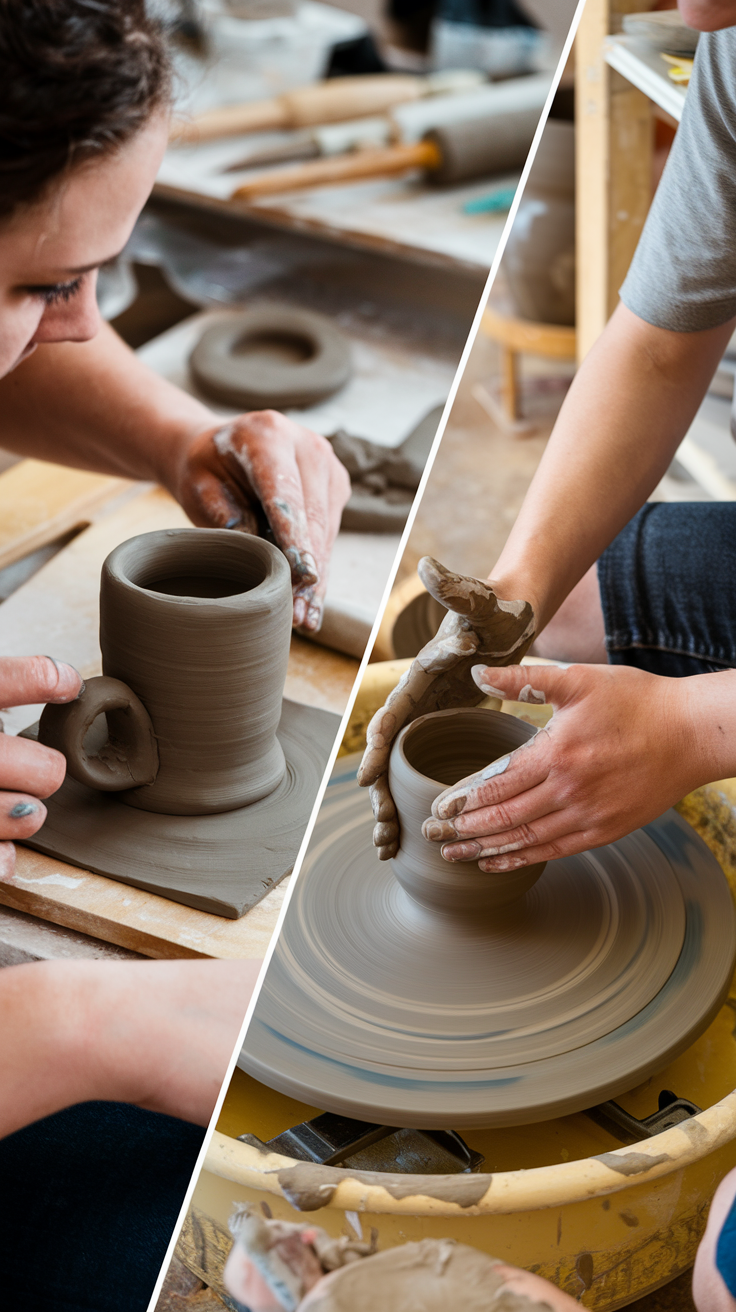
This is the most beginner-friendly method. You don’t need a pottery wheel, just your hands and a few tools.
-
Slab Method: Roll clay into flat sheets, cut into a rectangle for the mug body, and a circle for the base. Join with slip and smooth the seams.
-
Pinch Method: Roll clay into a ball, press your thumb into the center, and pinch outward to form walls.
Wheel-Throwing
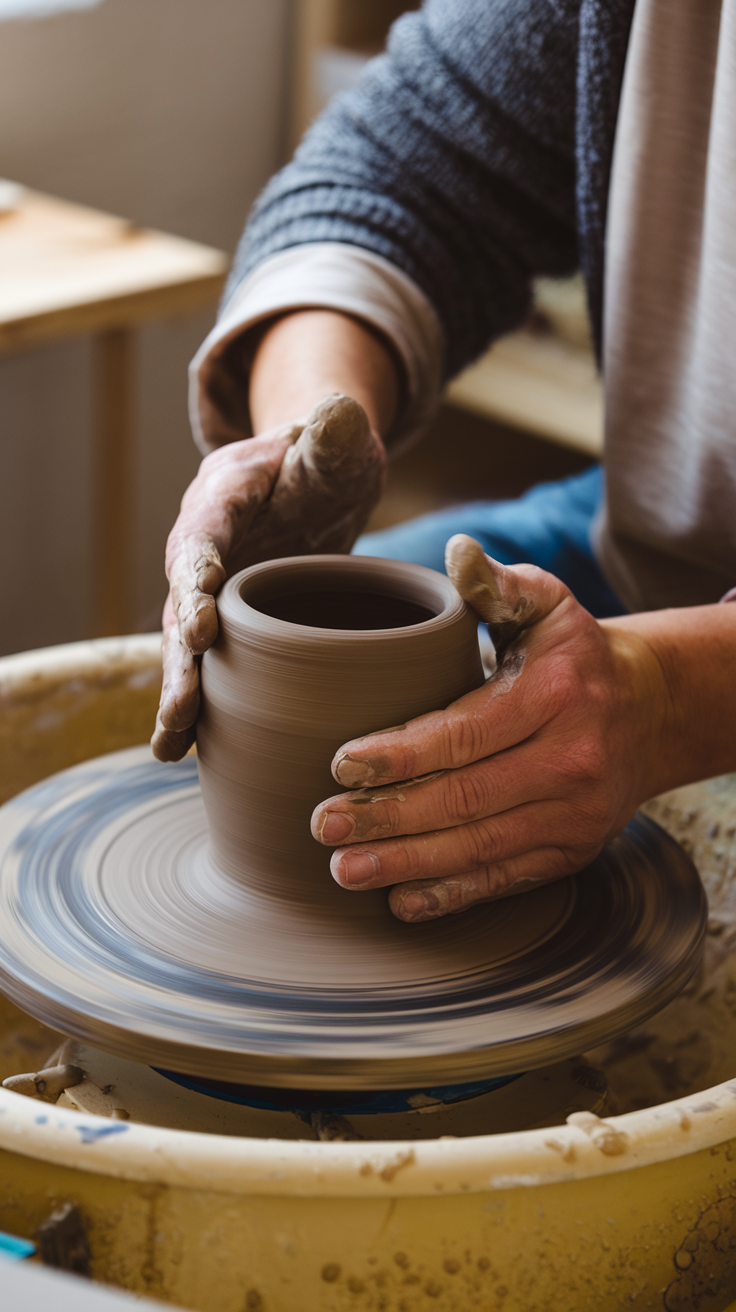
If you have access to a pottery wheel, it’s a fantastic way to create smooth, symmetrical mugs.
-
Center your clay on the wheel.
-
Open the clay by pressing down in the middle.
-
Pull the walls upward, shaping the cylinder.
-
Use a rib tool to refine the surface.
Tip: Wheel-throwing takes practice. Don’t be discouraged if your first few mugs are wobbly—they’ll still have charm!
Adding the Handle
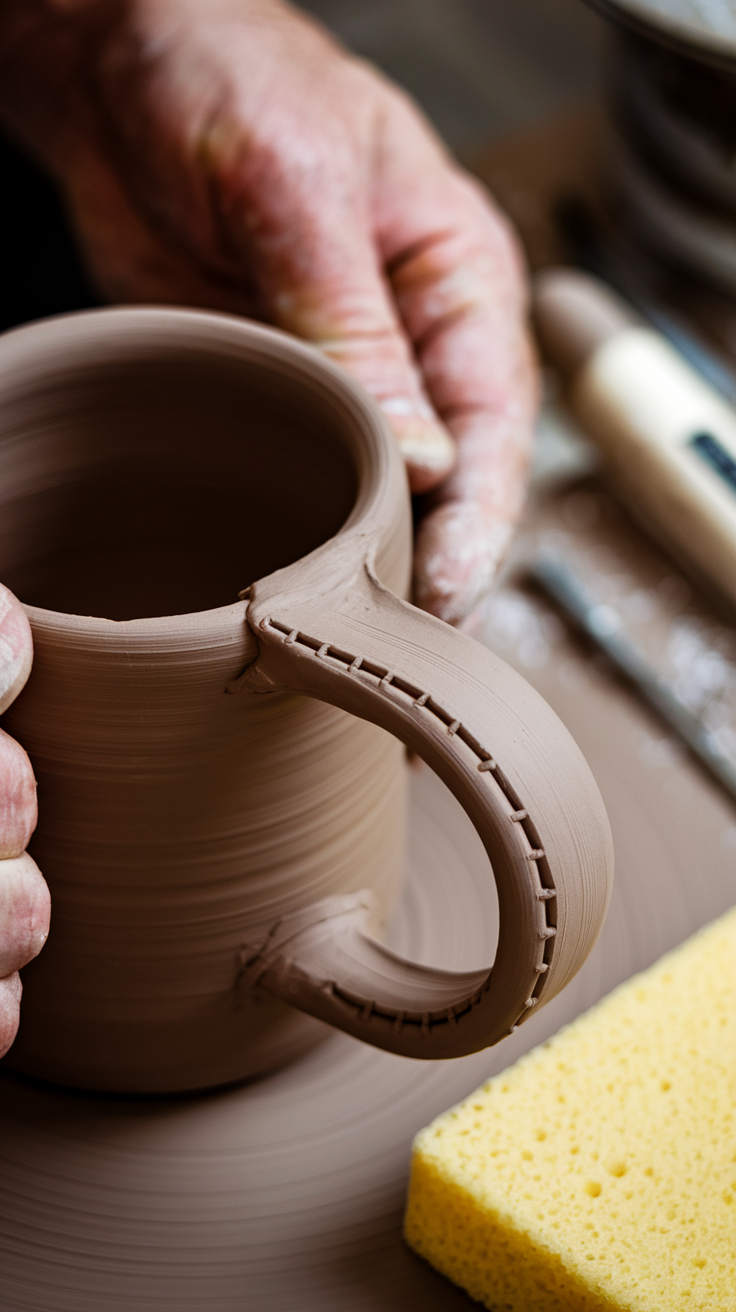
A mug isn’t complete without a comfortable handle.
-
Roll out a coil of clay.
-
Flatten slightly and shape into a “C” or “D.”
-
Score (scratch) and slip both the mug wall and the handle ends.
-
Attach firmly, smoothing edges for a seamless finish.
Test the handle size in your hand before attaching—it should feel natural to grip.
Smoothing and Refining the Mug
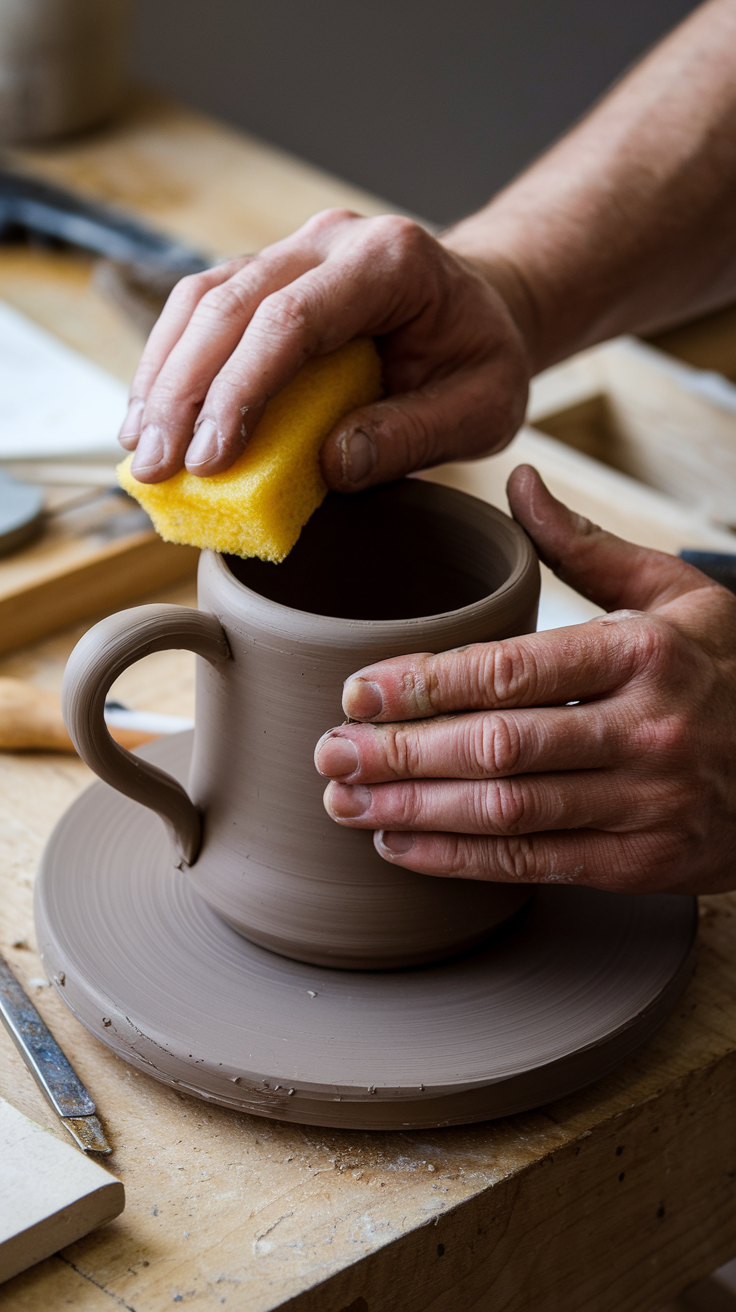
After shaping, it’s time to refine:
-
Use a damp sponge to smooth rough edges.
-
Trim excess clay from the base.
-
Make sure the walls are even in thickness.
Tip: Thin walls may crack, while overly thick walls can feel clunky. Aim for about ¼ inch thickness.
Drying Process
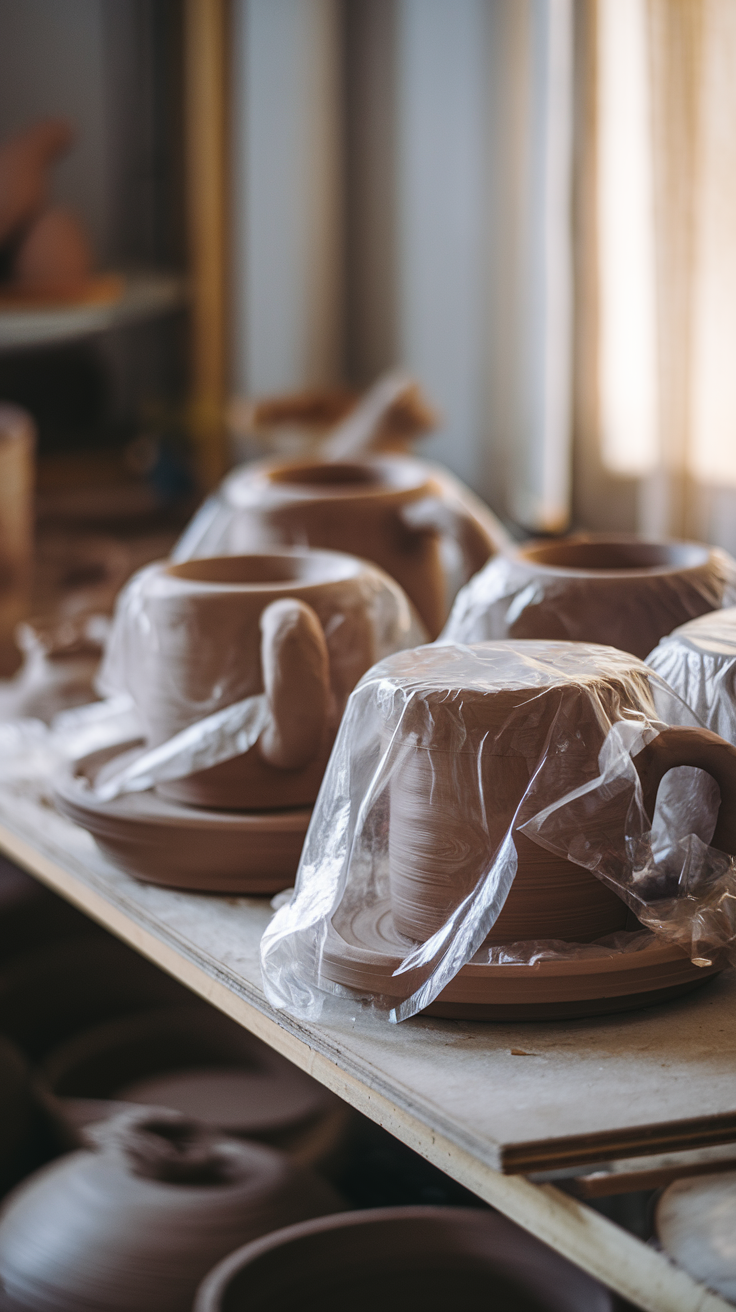
Patience is essential here.
-
Let the mug dry slowly to avoid cracks.
-
Cover with plastic loosely to control moisture release.
-
Dry until bone dry (completely white and non-cool to the touch).
Warning: Rushing drying leads to cracks—never place clay in direct sunlight or near a heater.
Glazing and Decorating
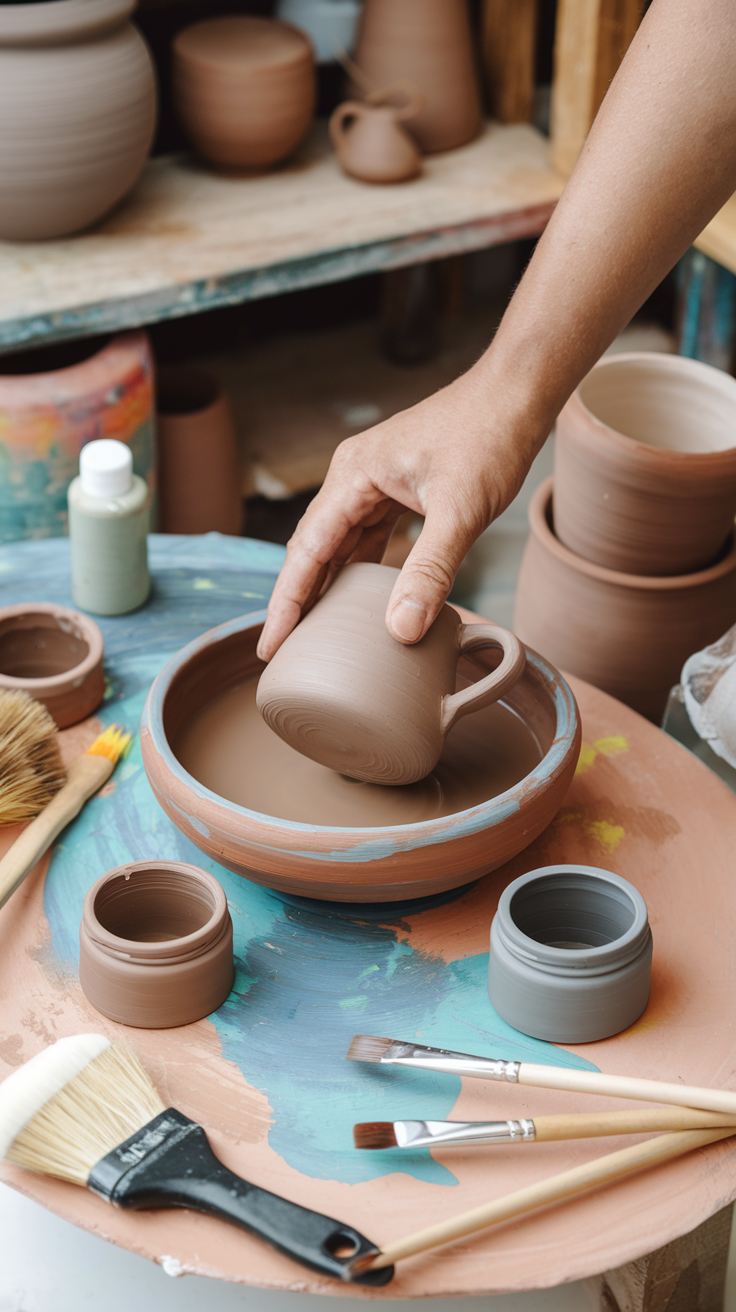
This is where your creativity shines.
-
Underglaze Painting: Add designs before the final glaze.
-
Dipping or Brushing: Apply even coats of glaze for a smooth finish.
-
Wax Resist: Create patterns by brushing wax where glaze won’t stick.
Tip: Always use food-safe glazes for mugs, especially inside surfaces.
Firing Techniques
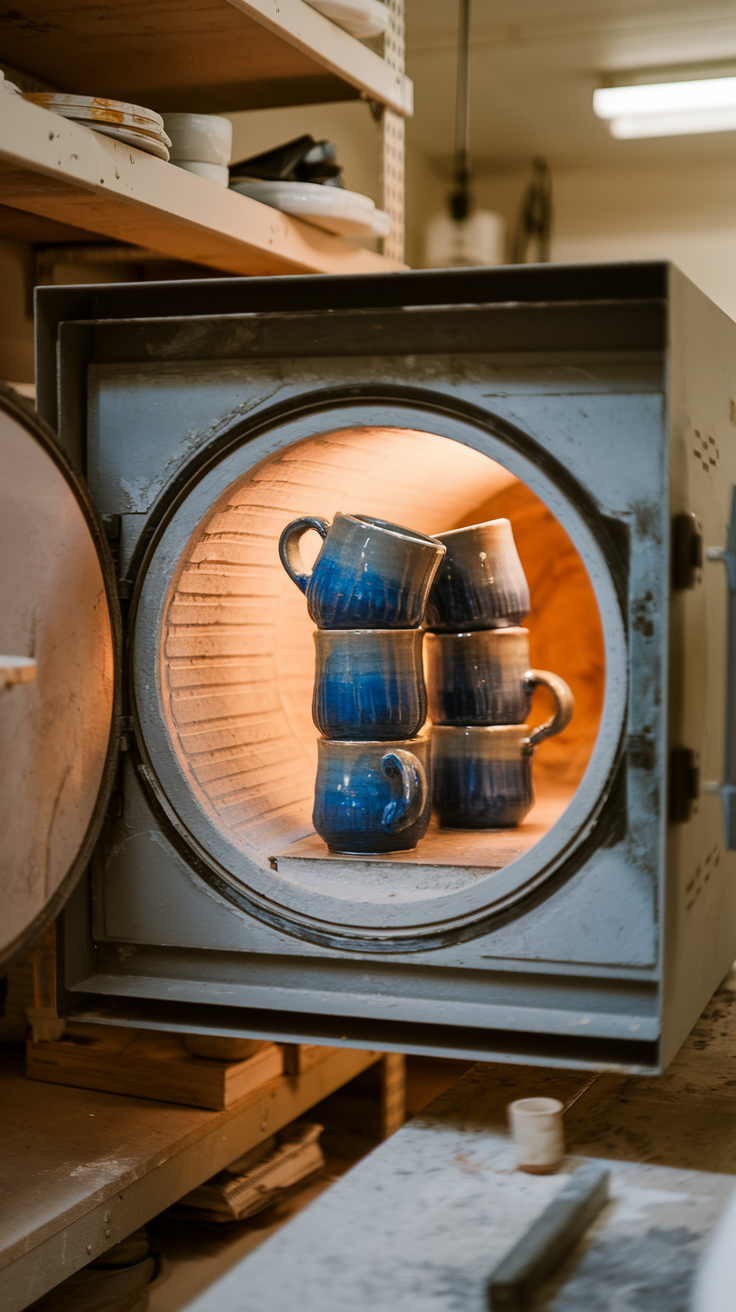
Firing transforms clay into ceramic.
-
Bisque Firing: First firing at a lower temperature to harden the clay.
-
Glaze Firing: Second firing at a higher temperature to melt and seal the glaze.
If you don’t own a kiln, many local pottery studios or community centers offer kiln rentals.
Finishing Touches and Care Instructions
After the glaze firing, your handmade mug is ready! Test for durability by tapping lightly—your mug should feel solid and ring slightly.
Care Tips:
-
Hand wash to preserve glaze.
-
Avoid sudden temperature changes (like pouring boiling water into a freezing mug).
-
Enjoy daily use, but treat it with love—it’s one of a kind!
Common Challenges and Troubleshooting
-
Cracks: Usually from air bubbles or drying too fast. Wedge thoroughly and dry slowly.
-
Uneven Handle: Reposition before firing—once fired, it’s permanent.
-
Glaze Drips: Wipe the mug’s base clean before firing to prevent sticking to the kiln shelf.
Personalization Ideas
Handmade mugs are as unique as their makers. Try:
-
Carving initials or patterns into the clay.
-
Mixing glaze colors for a marbled look.
-
Adding texture with stamps, lace, or leaves.
-
Creating themed mugs for holidays or gifts.
The Therapeutic Benefits of Mug-Making
Crafting with clay isn’t just about the end result. It’s a mindful, calming process that encourages creativity and patience. The tactile nature of clay can reduce stress, while the focus required provides a meditative escape from daily routines.
Beginner-Friendly Resources
-
Books: Clay and Glazes for the Potter by Daniel Rhodes.
-
Courses: Check Skillshare or Udemy for pottery basics.
-
Local Studios: Many offer beginner classes where you can practice with guidance.
Conclusion: Your First Step into Handmade Ceramics
Making a handmade mug is more than a craft—it’s a journey into creativity, mindfulness, and skill-building. With just clay, simple tools, and your imagination, you can create a piece that blends function with artistry. Don’t worry if your first mug isn’t perfect—its imperfections are what make it uniquely yours.
So, roll up your sleeves, gather your clay, and get started. Your morning coffee will taste even better when sipped from a mug you shaped with your own two hands.
Pingback: 15 Handmade Clay Mug Ideas to Inspire Your Next Pottery Project - blessmeup.com