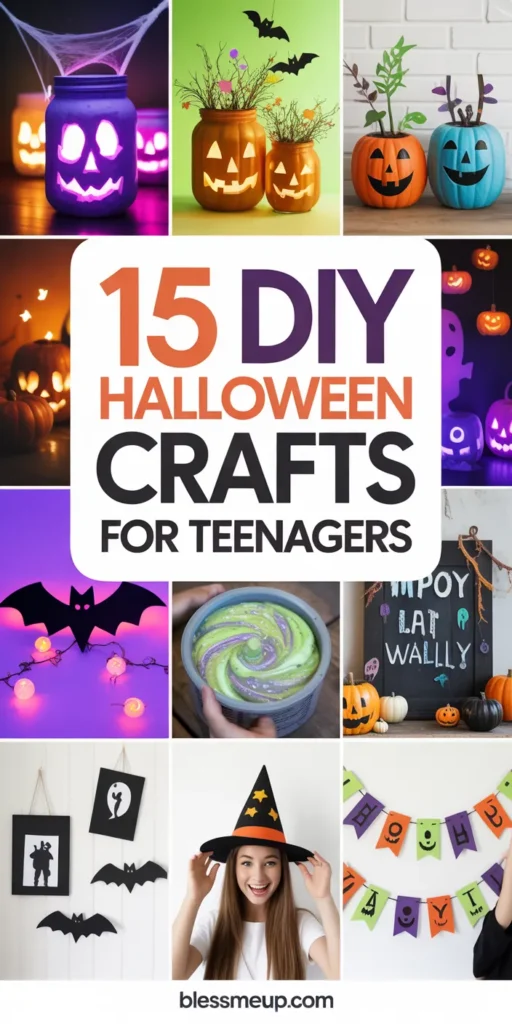
Halloween is the perfect excuse to unleash your creativity and show off your crafty side. For teenagers, it’s not just about trick-or-treating—it’s about creating something cool, personal, and maybe even worthy of your Instagram feed. These DIY Halloween crafts are designed for teens who want unique, stylish, and budget-friendly projects that stand out.
Each idea includes a supply list, step-by-step instructions, estimated cost, difficulty level, and tips for customizing. Let’s dive into 15 awesome DIY Halloween crafts made just for you!
Glow-in-the-Dark Mason Jar Lanterns

Glow-in-the-dark mason jar lanterns are a simple yet magical Halloween project that teenagers can easily make. All you need are mason jars, glow-in-the-dark paint, a small brush, and optional glitter or stickers for extra flair. Start by painting small dots, streaks, or even spooky shapes on the inside of the jar. Once the paint dries, place a small LED tea light or fairy lights inside to make the designs glow.
The best part is the flexibility—no two jars will ever look the same. Teens can create starry-night vibes, ghostly faces, or even write spooky words like “Boo” or “Creepy.” They make great room decor, party table accents, or even a glowing path for trick-or-treaters. This project is budget-friendly, beginner-friendly, and totally Instagram-worthy.
DIY Halloween Phone Case Designs
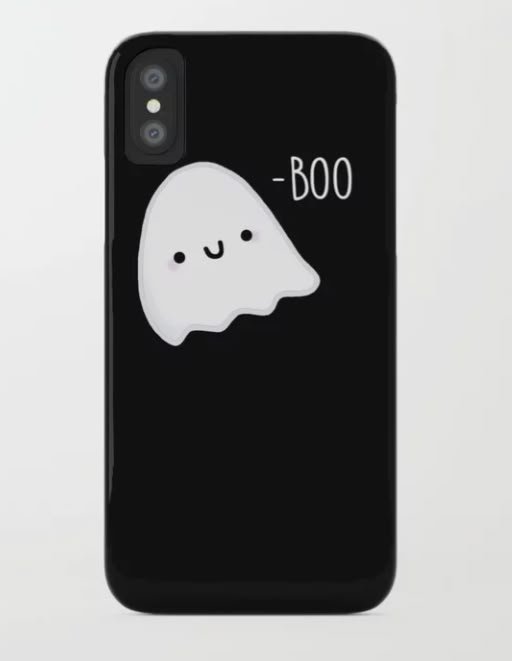
A fun, personal craft for teens is customizing a plain phone case with Halloween designs. Clear or solid-color cases work best, paired with paint pens, permanent markers, or printable stickers. Start by sketching ideas—think pumpkins, ghosts, cobwebs, or bats. Then carefully decorate the case with your chosen tools, layering details like glitter glue or puffy paint for extra texture.
The project not only lets teens show off their creativity but also gives them a festive accessory they can carry everywhere. For those who prefer less commitment, designs can be drawn on removable inserts that slip inside a clear case. This way, you can switch from spooky season to everyday style whenever you want.
Spiderweb String Art
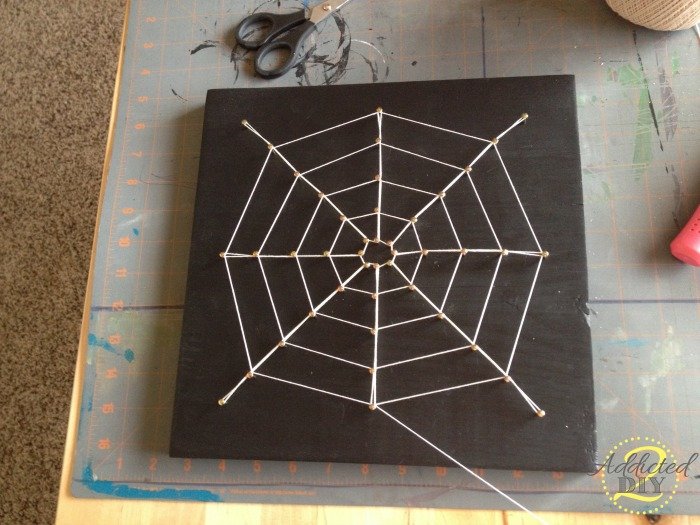
Spiderweb string art is a trendy craft that makes for a striking Halloween wall decoration. To start, you’ll need a wooden board, white or black string, small nails, and a hammer. Mark a central point on the board, then evenly space nails in a circle around it. Tie the string to the middle nail and weave it outward, looping around the nails to form a web. Add layers until the design looks full and spooky.
Teens can personalize it by painting the board in Halloween colors before starting or adding a small plastic spider in the middle for extra effect. It’s a little more time-consuming, but the end result is modern, artsy, and perfect for a bedroom or party backdrop.
Painted Pumpkin Planters
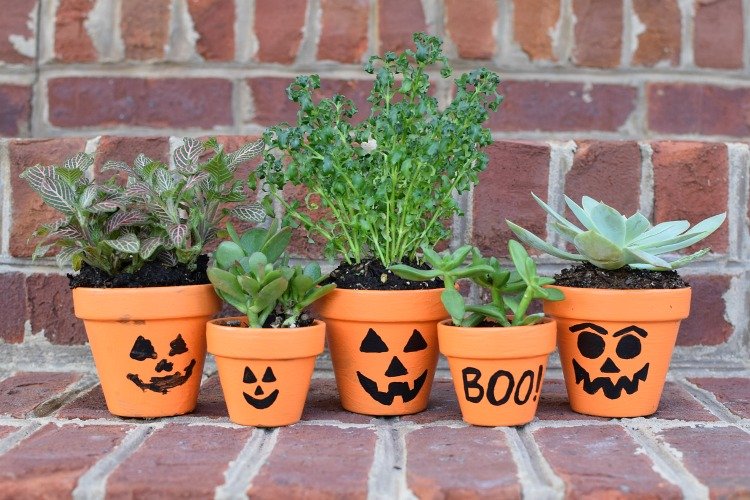
Painted pumpkin planters are a fun way for teens to mix gardening with Halloween creativity. Start with either real mini pumpkins (scooped out) or craft foam pumpkins. Cut a hole at the top and hollow them just enough to fit a small plant pot. Once prepped, paint the outside with bold Halloween colors—orange, black, and purple—or even create quirky faces like vampires, witches, or silly monsters. Add a clear sealant if you’re using real pumpkins so the paint lasts longer.
These planters are great for succulents, fake flowers, or even candy displays. They double as room décor or party table centerpieces. Teens will love showing off their spooky-yet-cute mini planters in photos or gifting them to friends.
DIY Witch Hat Headbands
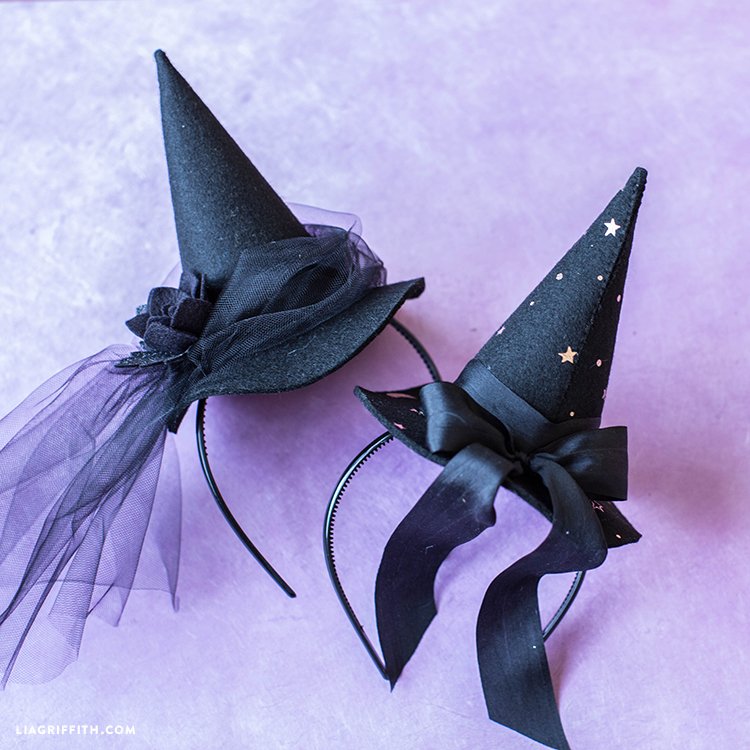
DIY witch hat headbands are both stylish and festive—perfect for parties or selfies. All you need are black felt, cardboard, hot glue, and a plain headband. Cut the felt and cardboard into a cone and brim shape, glue them together, and then attach the mini hat securely to the headband. To personalize, add ribbons, sequins, or glittery stars.
This craft is lightweight, inexpensive, and wearable all Halloween season. Teens can even create a whole set with different styles—classic witch, pastel goth, or sparkly glam—and swap them with friends. It’s also a creative way to pull together a last-minute costume without needing a full outfit.
Glow Stick Broomsticks
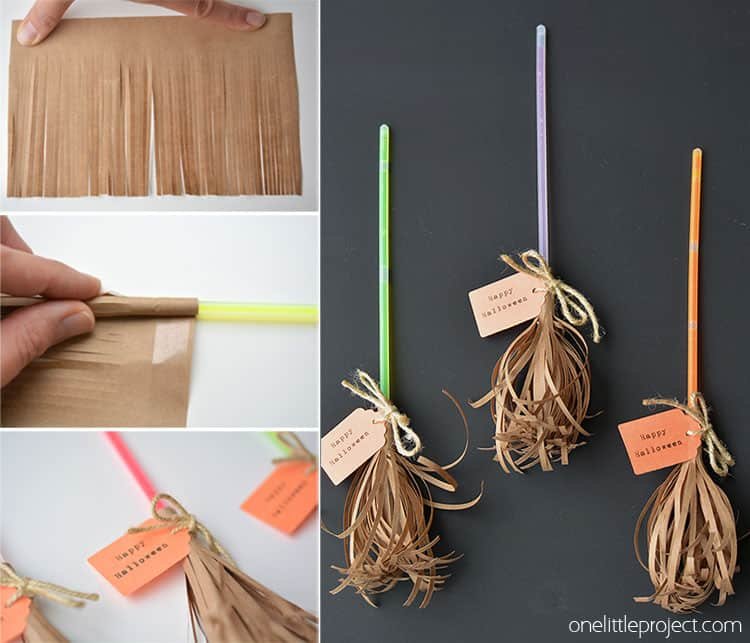
Glow stick broomsticks are quirky, glowing accessories that work as party favors, room décor, or Halloween night fun. For this project, gather glow sticks, brown paper bags or raffia, scissors, and tape. Cut strips of paper or raffia to form the broom “bristles,” wrap them around one end of the glow stick, and secure tightly with tape or twine. When the glow sticks are cracked and glowing, the effect is magical—tiny witch brooms that light up!
They’re safe, budget-friendly, and can be made in bulk for handing out at gatherings. Teens can also stick them into jars or buckets for glowing room accents. They look especially cool in dark rooms or outdoor settings and are totally Instagram and TikTok ready.
Halloween-Themed Dreamcatchers
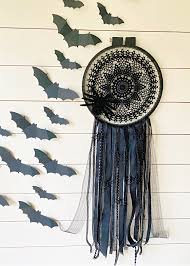
A Halloween twist on dreamcatchers makes for a unique craft that doubles as room décor. Start with an embroidery hoop or a wire ring as the base. Wrap it in black yarn, ribbon, or even glow-in-the-dark string. For the webbing, use orange, purple, or metallic thread, weaving it in the classic dreamcatcher pattern. Add Halloween charms like tiny bats, plastic spiders, or mini skulls hanging from the bottom with ribbon or chain.
The final look is equal parts spooky and aesthetic—perfect for hanging above a bed, on a door, or as a photo backdrop. Teens can also personalize by using glitter spray or glow-in-the-dark beads. These dreamcatchers not only look amazing but also give that mystical, witchy vibe that fits the season perfectly.
DIY Skull Candle Holders
DIY skull candle holders are both edgy and stylish—a craft teens will love for their rooms or party tables. To make them, grab plastic skulls (Dollar Tree is a great source), tea lights, and a craft knife. Cut a hole in the top of the skull just large enough to fit a candle. Spray paint the skulls matte black, silver, or even neon colors for a more modern look.
For extra flair, add metallic accents with gold paint pens or drip fake red wax for a gothic vibe. These candle holders create an eerie glow at night, instantly setting the Halloween mood. They’re also very Instagram-worthy, especially when styled in groups on a shelf or desk.
Spooky Light Switch Covers
Transforming ordinary light switch covers into Halloween art is an easy but super fun project. Remove the cover plate, then paint it with acrylics in Halloween designs—like black cats, haunted houses, or dripping slime effects. For a quicker option, cover the plate with Halloween-themed scrapbook paper or washi tape, sealing it with Mod Podge. Teens who love texture can glue on tiny spiders or glow-in-the-dark stickers for an extra pop.
It’s a small project with a big impact—every time you flip the switch, you’ll be reminded of the spooky season. Plus, it’s renter- and parent-friendly since the cover can easily be swapped back after Halloween. The designs are endlessly customizable, making this a perfect group activity.
Halloween Mason Jar Terrariums
Mason jar terrariums are a creative way to bring a little Halloween magic into your room. Start with a clean mason jar and fill the base with black sand, moss, or even fake spiderwebs. Add tiny Halloween figurines like skeletons, pumpkins, or haunted houses—you can find these cheap at craft stores or dollar shops. Layer in LED tea lights or glow-in-the-dark pebbles to give the terrarium a spooky glow when the lights go out.
These jars look amazing on nightstands, bookshelves, or even as party centerpieces. The best part? Each terrarium can be totally unique—some can look creepy and dark, while others can be cute and playful. They’re also super easy to make with friends, since everyone can style their jar differently.
DIY Bat Wall Art
Turn your bedroom or party space into a bat cave with DIY bat wall art! All you need is black construction paper or cardstock, scissors, and tape. Trace bat shapes (you can print templates online) and cut out as many as you want—big, small, or even oversized for drama. Fold the wings slightly to give them a 3D effect, then stick them to your wall in a scattered or swooping pattern.
This project is quick, affordable, and creates a huge visual impact with little effort. For extra flair, spray a few bats with metallic silver or glow-in-the-dark paint so they stand out under black lights. Teens will love how this instantly transforms a plain wall into something Instagram-ready.
Monster-Themed Tote Bags
Monster-themed tote bags are both a craft and a fashion accessory! Grab a plain canvas tote bag, fabric paint, and brushes or markers. Paint on fun monster faces—think googly eyes, sharp teeth, or silly expressions. Teens who love texture can hot glue on felt shapes or stick real googly eyes for a 3D effect.
This is a great project to do with friends because each person can design their own unique bag. The finished totes are perfect for carrying books, using as candy bags on Halloween, or just adding a spooky twist to everyday outfits. Plus, they’re washable and reusable, so the craft is eco-friendly too.
Glow-in-the-Dark Slime
Slime never goes out of style, and glow-in-the-dark slime makes Halloween even better. Start with clear school glue, a little baking soda, and contact lens solution to create the slime base. Mix in glow-in-the-dark paint or glow powder to give it that eerie nighttime shine. Teens can get creative by adding glitter, fake spiders, or tiny plastic eyeballs for extra creep factor.
This slime is not only fun to play with, but it also looks amazing under black light—perfect for Halloween parties or TikTok videos. Make individual batches so everyone can customize their own slime colors and textures. Just remember to keep it stored in airtight containers so it doesn’t dry out.
Spooky Photo Booth Props
Photo booth props are a Halloween party must-have! Grab cardstock, wooden sticks, scissors, and markers or paint. Cut out classic shapes like vampire fangs, witch hats, ghost masks, and pumpkin glasses. Attach them to sticks using tape or glue so they’re easy to hold while posing.
Teens will love creating these props together, then snapping group selfies or making Instagram-worthy photo collages. To make the props extra fun, add glitter accents, feathers, or glow-in-the-dark details. You can also theme them around pop culture characters—think spooky versions of trending TV or movie icons.
Halloween Garland with Felt Shapes
Decorating with handmade garlands instantly adds Halloween vibes to any room. For this craft, cut out Halloween-themed shapes—bats, ghosts, pumpkins, or black cats—from colorful felt sheets. Use a hole punch or needle and thread to string the shapes onto yarn or twine. You can even alternate sizes and colors to make the garland more eye-catching.
This project is perfect for hanging across doorways, windows, or party tables. Teens can personalize their garlands with fabric paint, sequins, or googly eyes to give each shape personality. It’s simple, affordable, and a great bonding activity for a craft night with friends.
Final Thoughts
Halloween is all about self-expression, and these DIY crafts are perfect for teens who love showing off their creativity. Whether you’re decorating your room, making wearable accessories, or designing something Insta-worthy, each project is fun, budget-friendly, and guaranteed to impress.
So grab your supplies, invite your friends, and start crafting your way into a spooky, stylish Halloween!

